When I introduced two ways to surface Power Apps in Teams in my previous blog post, I missed one, which is the latest addition to the toolbox to get your Power Apps to Teams – although it’s been there for a while already. However, I’ve never used it before, so I thought I’d give it a shot.
Adding developer and partner “metadata” to your app
What you can do is, you can browse directly to you Power Apps maker portal and publish the app directly into Teams from there! The process is – in its most basic form – really simple and it has some additional benefits compared to the ways discussed earlier.
Simply browse to your apps details page (or use the Add to Teams option directly in the app’s context menu).
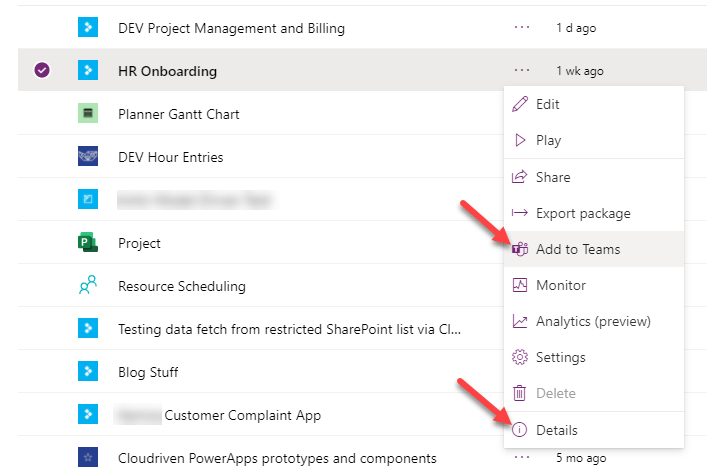
Once you’re on the app details page you have an option in the toolbar to add the app to Teams.

Once you click on the Add to Teams button you are presented with an Add to Teams panel on the right.

But before you jump to clicking on either of the bottom buttons, check the options under the Advanced settings – that uncovers the benefits I mentioned that you can’t acchieve via the methods presented earlier!
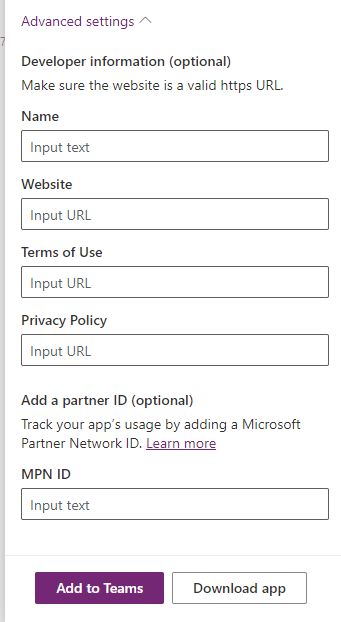
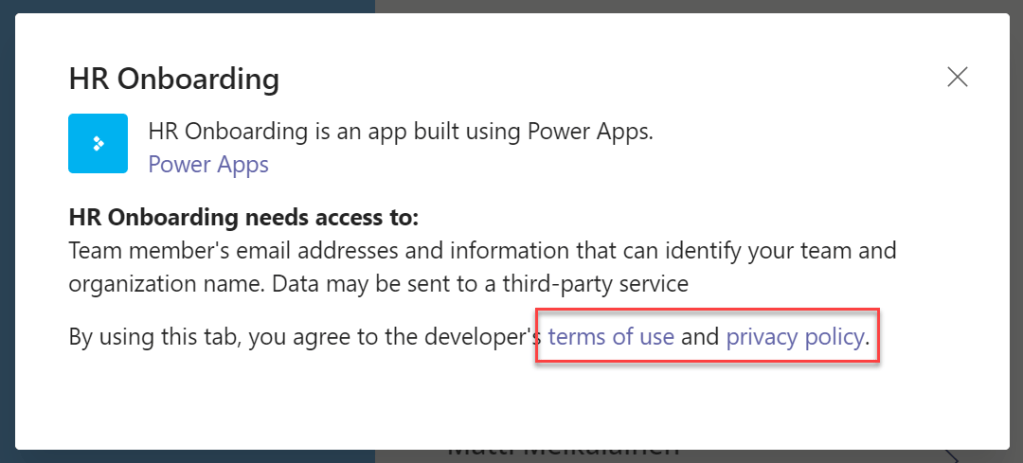
Filling in the above fields allows you to provide end users some additional information about your app. For example, if you provide Terms of Use and Privacy Policy URL’s, they can be accessed by the end user via app’s About dialog.
Using the MPN ID on the other hand provides possilibity to identify your organization as the Microsoft partner building the app. There are some benefits to this, such as:
- Usage of you app gets tracked and attached to your partner organization and you as a partner become more recognized by Microsoft when more organizations start using apps with your MPN ID
- Generating more traffic in Teams (via usage of your app) might help you towards some of your Microsoft Partner Competencies
You can find out your organization’s MPN ID at the Microsoft Partner Center.

You should use the Location MPN ID as instructed on the very same page, your Global MPN ID should not be shared to others than when in contact with Microsoft. If you don’t have an MPN account, you can create it by following these instructions.
After you have filled in you developer and partner information, it is time to deploy the app in Teams. There are two options you can carry on to achieve this, as you probably already noticed, you can either Add to Teams or Download app.

Add to Teams
This is the easiest way. Once you click on the Add to Teams button, your Teams client will pop up and you are presented with the series of following screens. After the “wizard” completes, you Power Apps app is surfaced as a Teams tab on channel of your choosing.


Download app
There are some drawbacks in the previous method that you can overcome by using the Download app button. The drawbacks are:
- There seems to be a bug causing the publisher of the app to show Power Apps even if you’ve specified the Developer Name in the Developer information section earlier. The link takes you to https://powerapps.microsoft.com/en-us/.

- There is no way to provide a URL parameters to your Power Apps app
Now, click on the Download app button. The app manifest gets downloaded as a zip package containing the manifest JSON file and the app logo. Note that the actual Power Apps canvas app is not included in the package – it is referenced as a URL in the manifest.
Installing app package directly to a Teams team
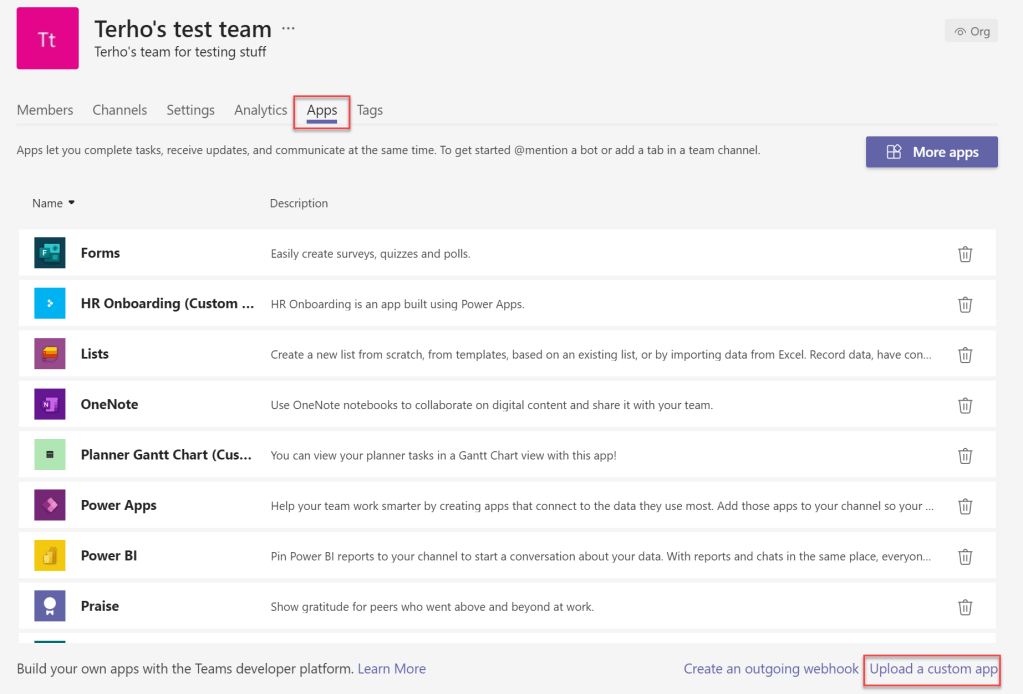
The simplest way to get the package installed to Teams team is to open the target team’s management view by selecting the Manage team option from the context menu.

From there, choose Apps tab and click on Upload a custom app.
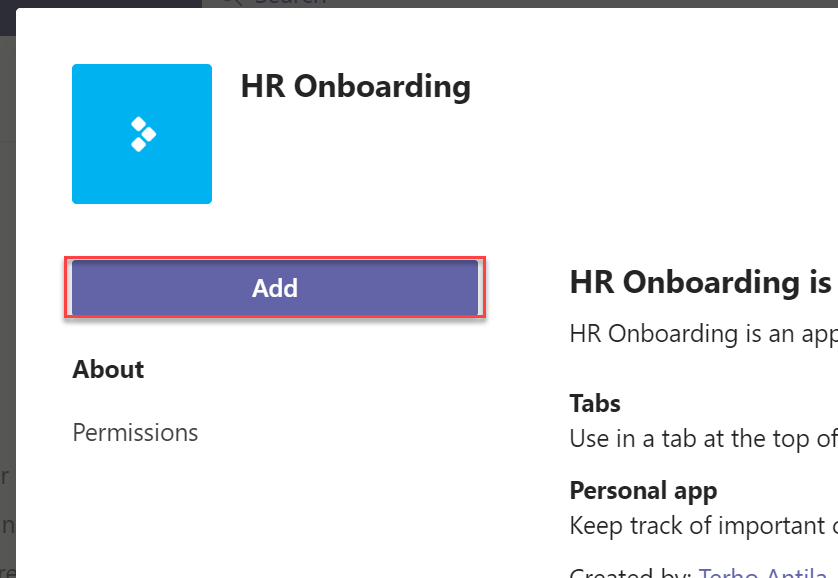
Locate you app package (zip), click Open and in the next dialog choose Add.
Your app is now added to the team and the tab is visible in the General channel. Now, if you check app’s info page, you can see the developer information displayed correctly.

Installing app package and adding URL parameters
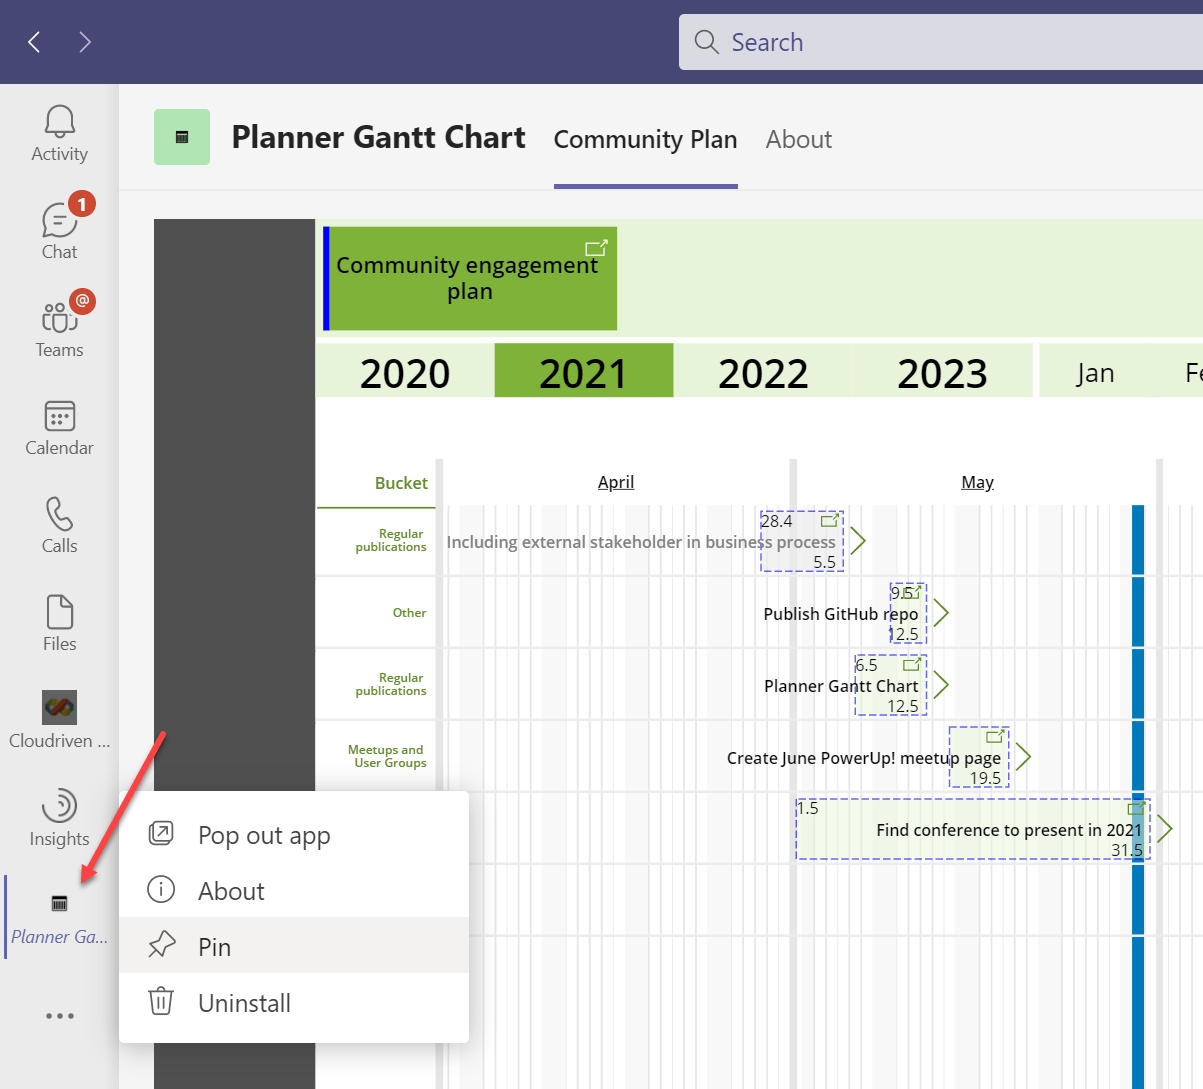
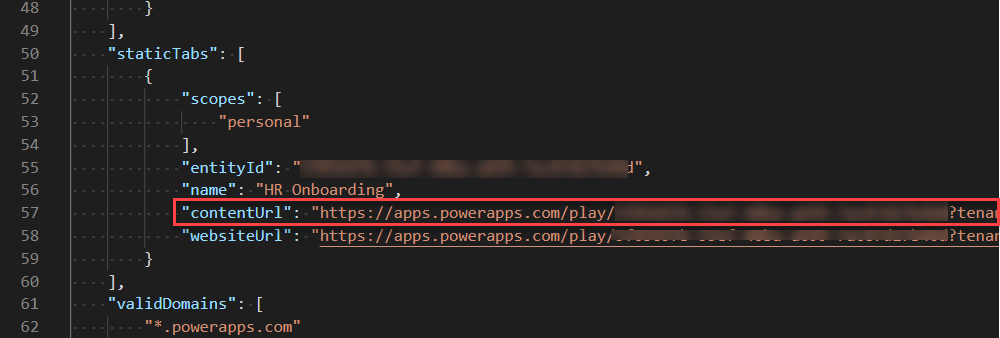
The previous method did not provide a way to add URL parameter to the app. Yet some Power Apps might take advantage of URL parameters, like the Gantt Chart I have blogged about earlier.
Basically we need to modify the contentUrl property of the app’s manifest file. But instead of extracting the zip package, modifying the manifest JSON manually and packaging the zip again, we can use App Studio!
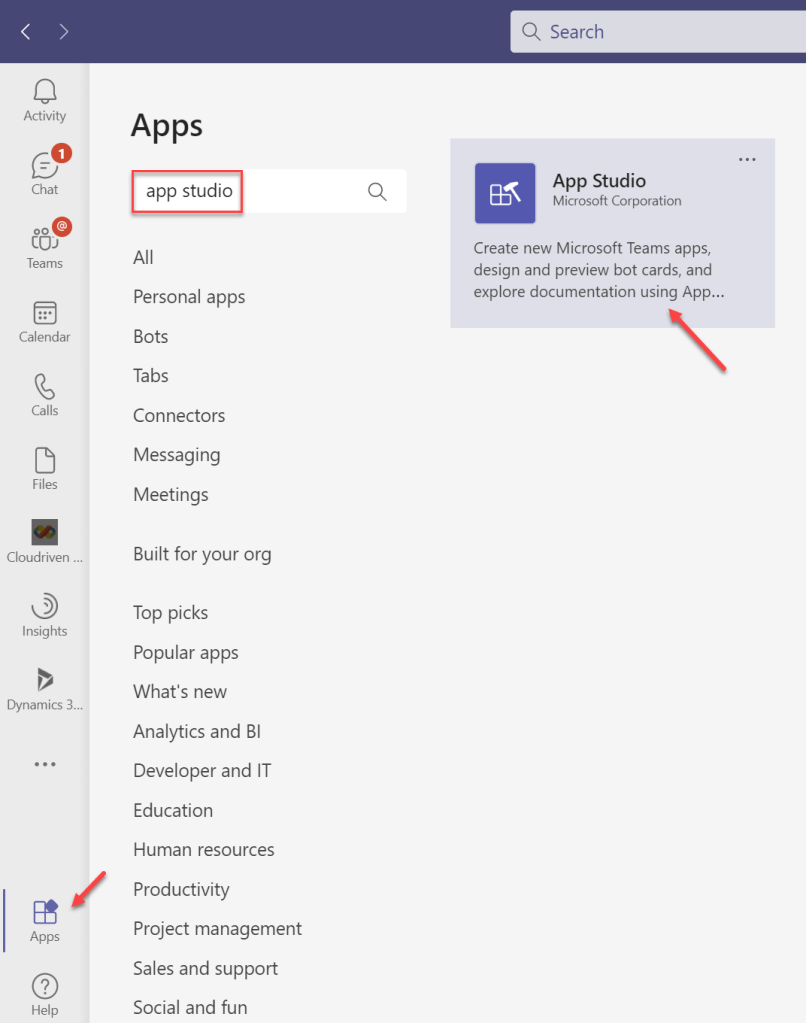
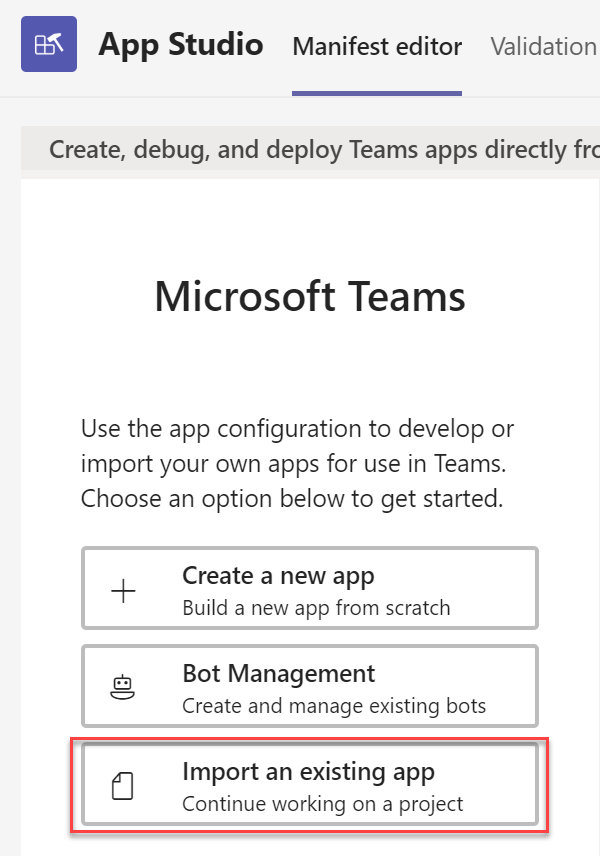
Go to Teams Apps, search for app studio and open the app.
In the Manifest editor click on the Import an existing app button.
Once again locate the app package you created earlier. The app is now opened in the Manifest editor.
Go to Tabs section. The first tab listed should be titled with you Power Apps app’s name. I am using Planner Gantt Chart app below and I have two tabs preconfigured: Planner Gantt Chart and About.
Click on the context menu of the first tab to edit its properties.

Now you can add additional URL parameters to the end of Content URL field! You can also modify tab’s Name. Click on the Save button to close the dialog.
Note: We are modifying a content URL of a personal tab. This means that the tab is not available it the app is added to a team or to a group chat.
To get the app installed into a Teams , select the Test and distribution section and click on Install.

Click on the Add button.

The app gets added Teams app bar as indicated below.

You can even Pin the app to have easier access to it later.
