
The challenge
Let’s face it: unit testing Power Apps is not possible. Surely, you can add some custom Power Fx code here and there to validate that elements are where they are supposed to be and to check that galleries contain correct data. But by doing this, you will
- make your solution much more complex, and
- be mixing you app’s logic with test logic.
Neither of above is a good thing. And this is not automated UI testing, which would be nice.
So let’s do something about that and try out if we can use Power Automate Desktop flows to test out a canvas app and report results. Furthermore, I’d like to automate this test as part of a DevOps Pipeline.
I’m using Cloudriven’s hour entry app as the test target. The app is used by Cloudrivers to enter their daily hours.
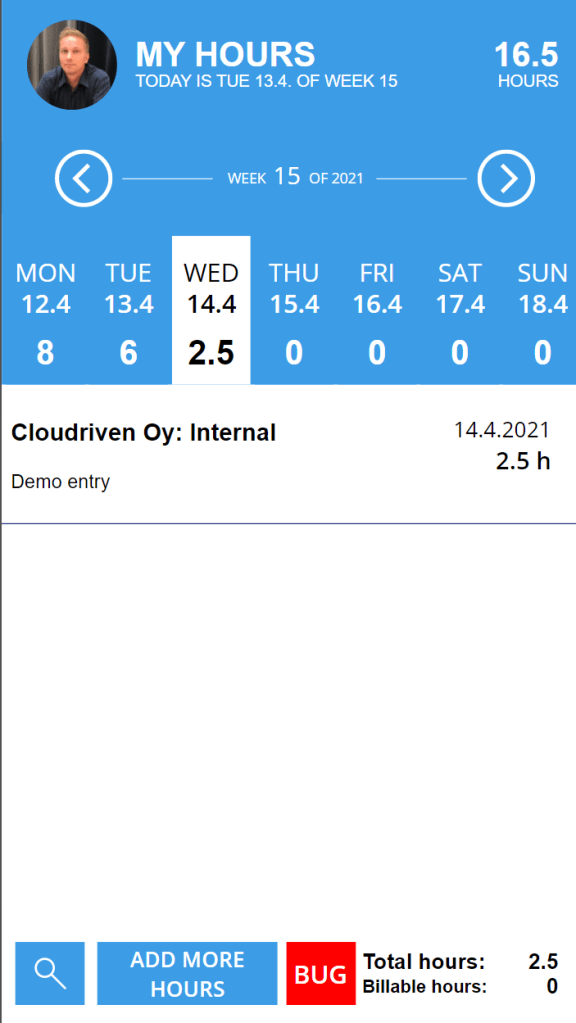
My test will be simple: I’ll add an entry to the current day and then validate that the entry is visible on the day’s hour listing.
Let’s start by adding a new flow to my local Power Automate Desktop. I’ll name the flow as Test Hour Entries App.
Hitting the wall with canvas apps
Hmm, okay, there seems to be a significant blocker what it comes to accessing Power Apps UI with Desktop flows – simply put, you can’t!
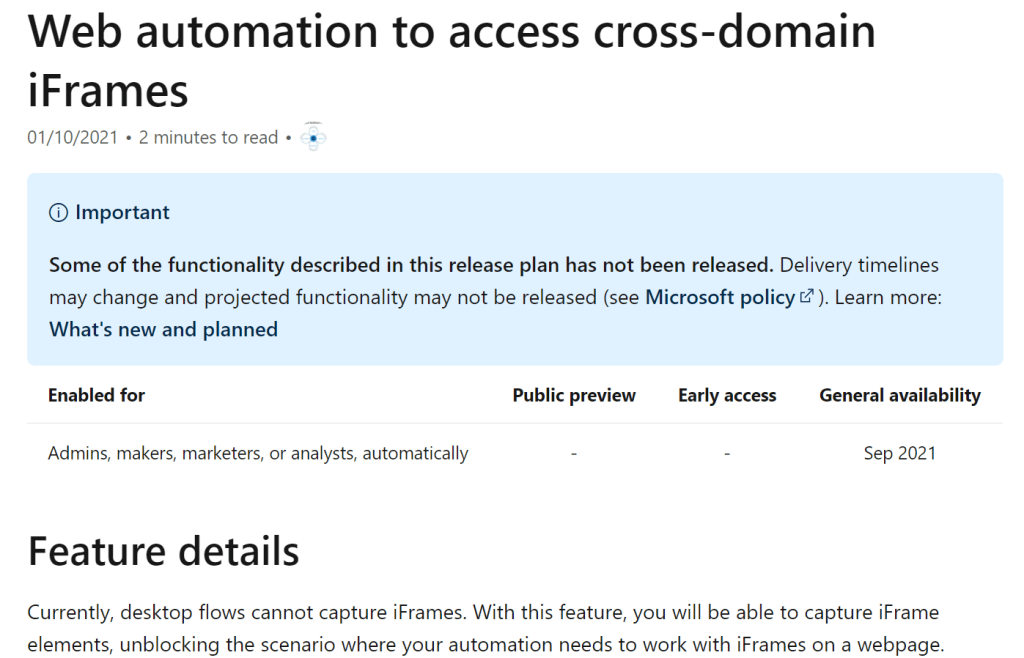
So, let’s get back to this in September, I guess…
Testing with model-driven apps
…unless 🤔 There’s huge amount of other components in Power Platform other than Power Apps canvas apps, of course. For example, what about model-driven apps?
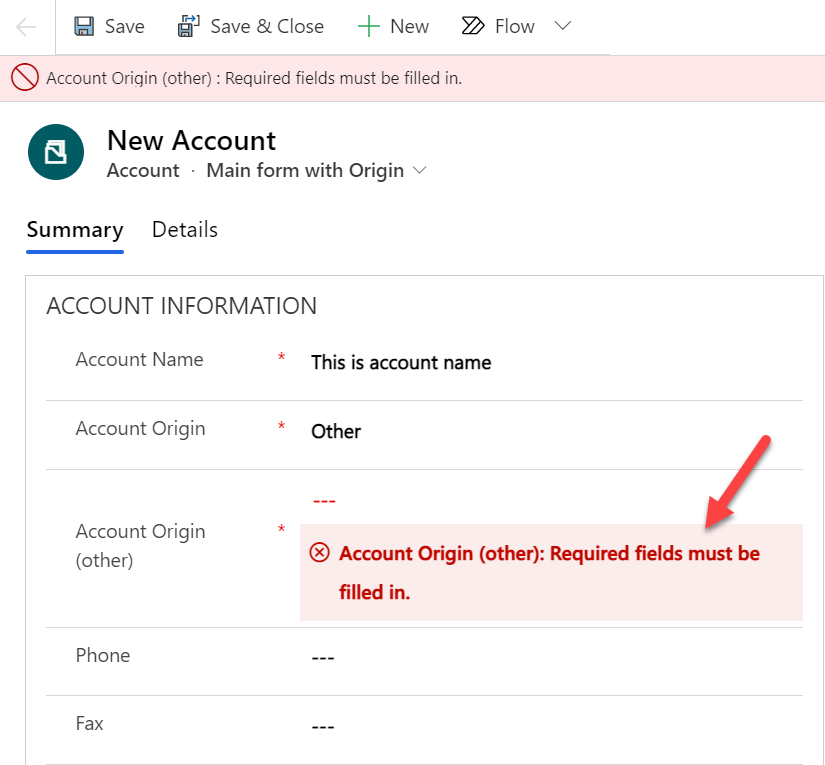
I’ll give this another shot by targeting my automated test to an entity from. First, let’s add some custom features to the out-of-the-box Account table. I created a new column called Account origin, which is a choice field with options Lead, Colleague, Social Media, Another Customer and Other that the user has to choose from when creating a new customer (account). I also creted a text field Account Origin (other).

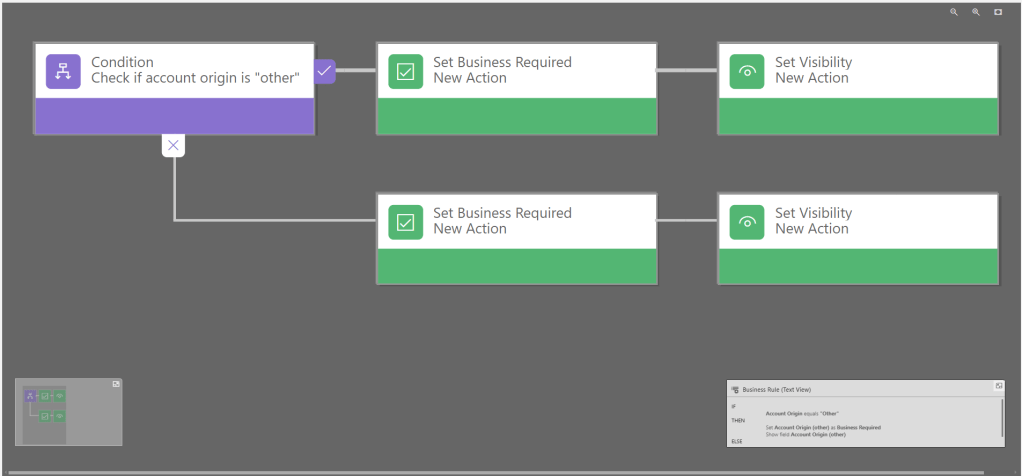
Next, I created an entity scoped business rule that displays the Account Origin (other) text field only if the selected option in Account Origin field is Other – in this case the text field is also set as business required. Otherwise the rule hides the text field.
I’ve also created a new main form for the Accounts table to include the new fields.
I want to create an automated web test so that I can validate that the business rule works as expected. I need to test it so that the Desktop flow will open up a new account form, choose Other as the Account Origin, try saving and validate that an error text is displayed as the required Account Origin (other) text field is not filled. Then the flow will fill in the required field and finalize saving.
The Desktop flow with actions explained
I will not document the creation of the Desktop flow in detail, but I will highlight some findings I made along the way. Perhaps they can be of some use to someone else. To summarize: simply recording the use case was not enough, I had to tweak the steps here and there quite a bit 😬
Eventually I got things working as I wanted and here is the picture of the final working Desktop flow steps.
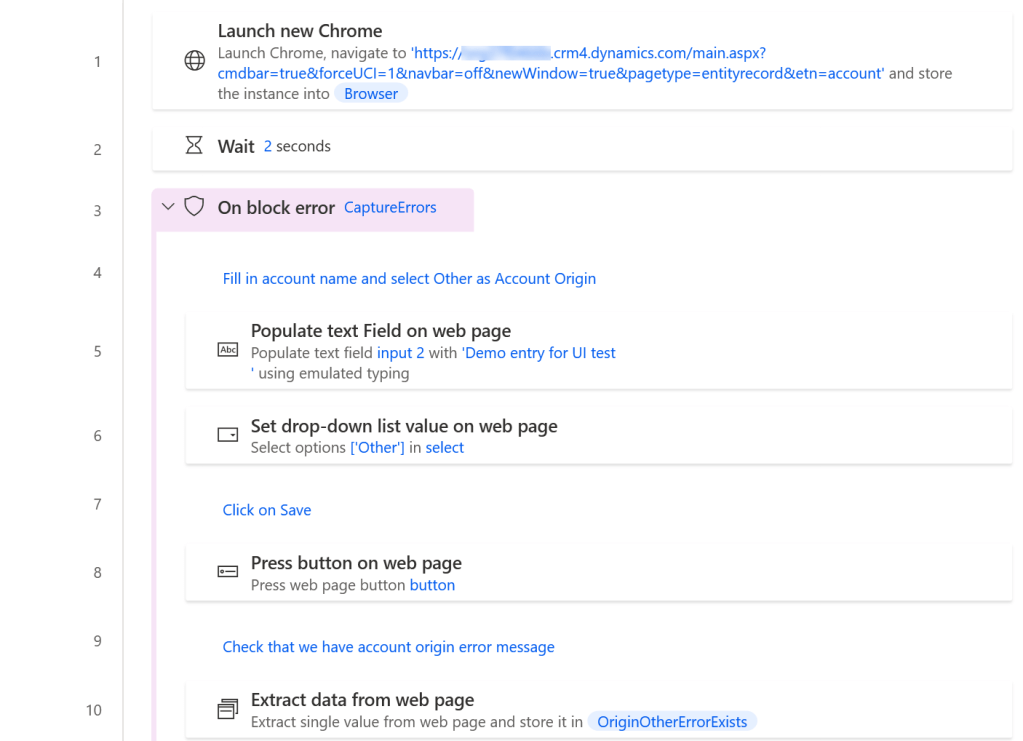
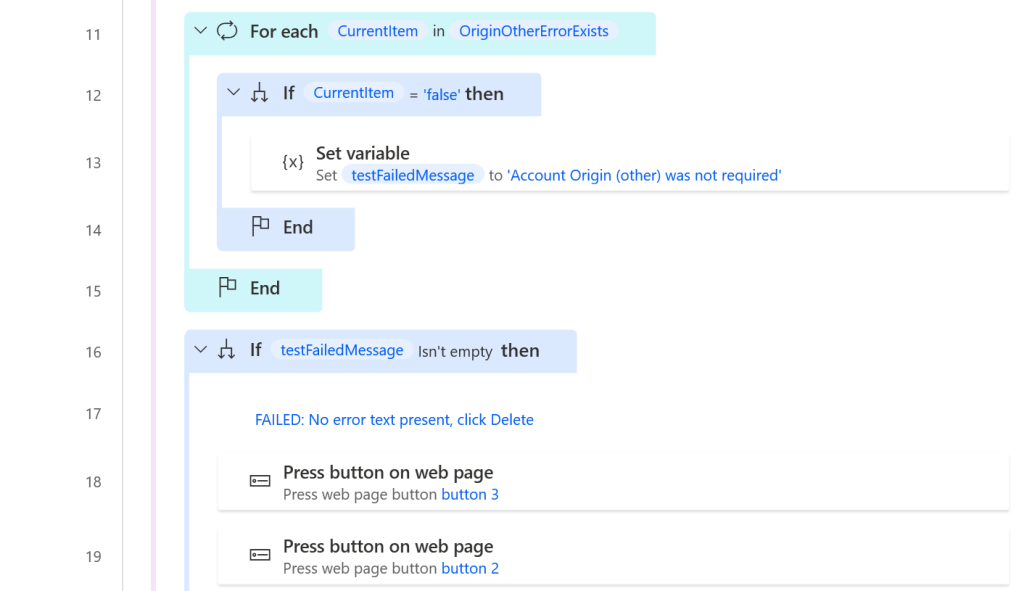
Here are some of the things I want to highlight in the above steps.
#2 Not sure if the Wait is actually needed, but it felt safer to have it 😆
#4, #7, #9… Comments – use them! It will make your flow a lot easier for others to understand. You can’t rename your steps, so a step titled Press button on web page doesn’t really cut it. Use comments!
#10 This step is responsible to check whether the error message is in page DOM after the Save-button is clicked.
I was not able to validate the existance of the error element without inspecting the page source and the copying the CSS selector of the desired element. Thankfully you can click on the Advanced settings in the Live web helper dialog!
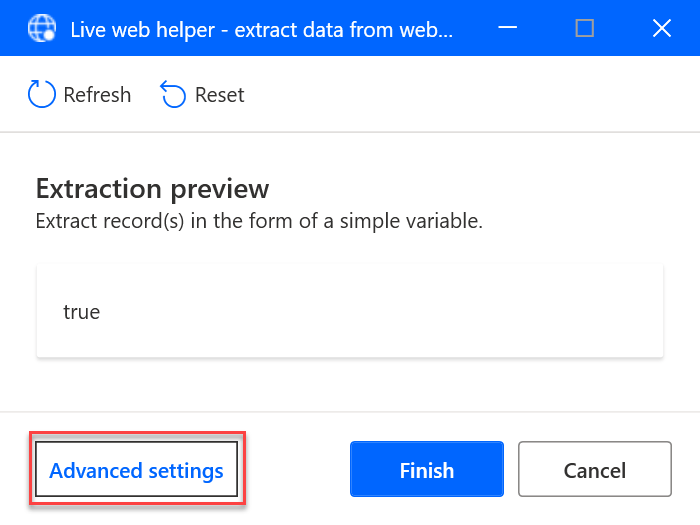
With that, you can paste you CSS selector into the appropriate field and use Exists as the Attribute value.
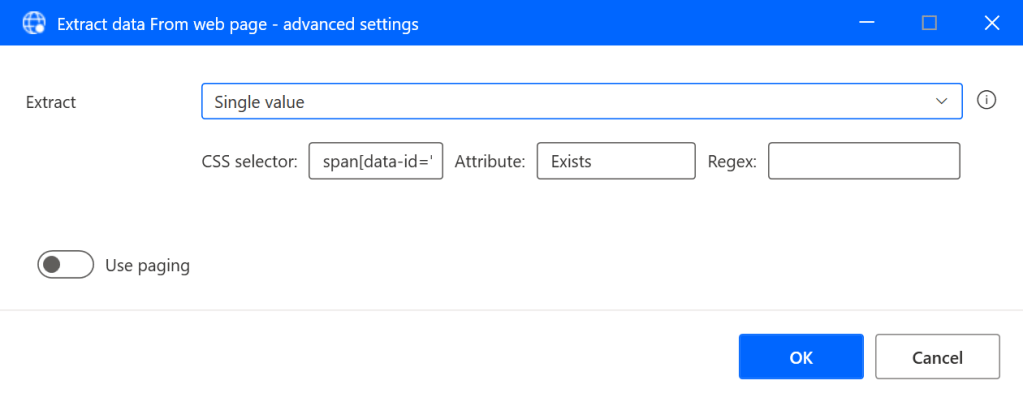
CSS selector I am using is below.,
span[data-id="terho_accountoriginother-error-message"]
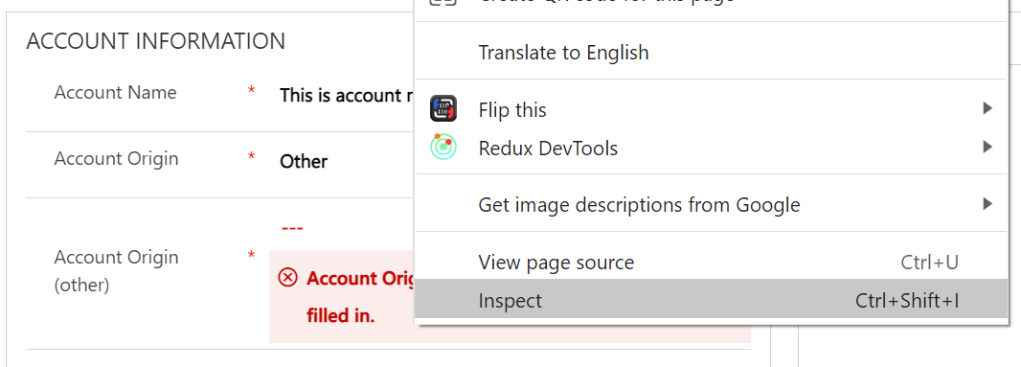
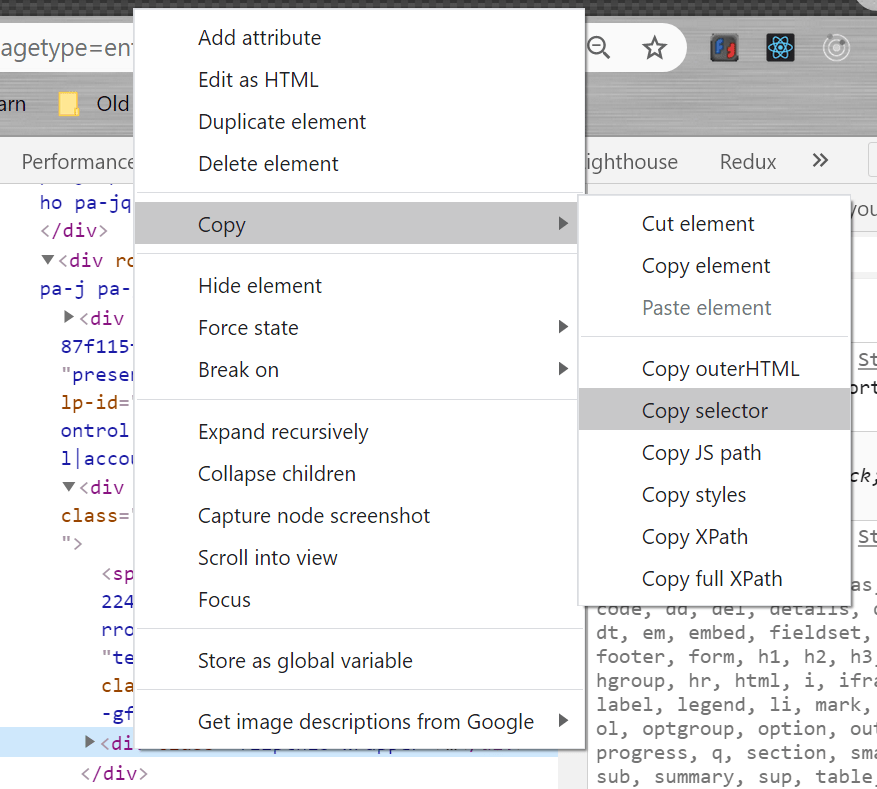
You can quite easily get the correct selector on your web form with Chrome browser by right-clicking the element -> Inspect -> Copy > Copy selector.
#11 – #15 Extraction of the data in the previous action resulted into a table with one row and one column. The value of the row field is either true or false depending on the existance of the error label on the form.
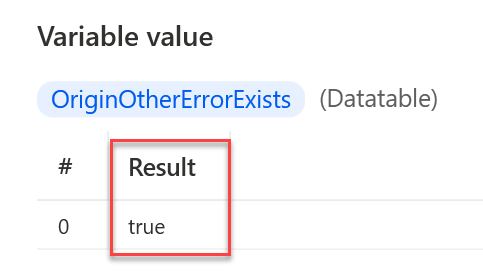
That is the reason we need a loop to extract the value of the first (and only) row of the table. If the element did not exist (the value equals false) we set the output variable’s testFailedMessage value to “Account Origin (other) was not required”. This means, that whenever this Desktop flow return other than an empty string in testFailedMessage output variable, the test has failed!
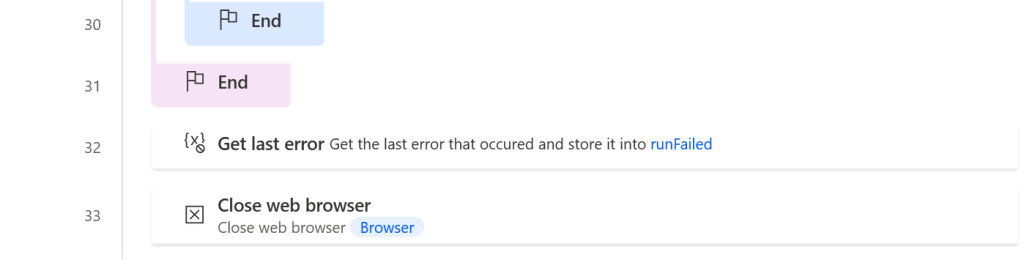
#16 Next the flow tests whether the test failed (meaning the error label did not exist). If it failed, then we click on the Delete button (#18) and click again on the confirmation dialog (#19). This removes the test record created in the Accounts table.
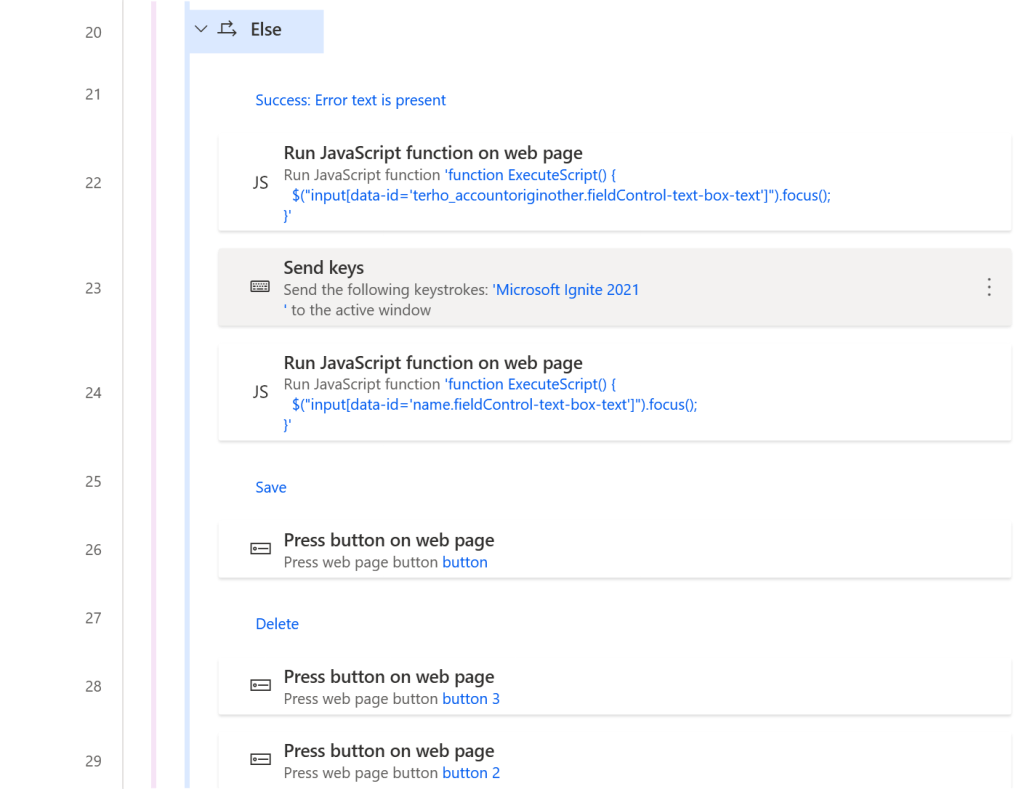
#20 If the test did not fail, we proceed to the Else branch to fill in the required Account Origin (other) text field.
#22 – #24 For some reason, typing in to the required field that was revealed by the business rule when the automation selected Other as the Account Origin was not so straight forward. I was not able to record it and have it working just like that. Instead, I used an action called Run JavaScript function on web page, that allows us to inject JavaScript code and run it in the page context. With that I had to set focus on the correct input field and then use Send keys action to type in the desired text.
function ExecuteScript() {
  $("input[data-id='terho_accountoriginother.fieldControl-text-box-text']").focus();
}
The working flow in action
Final steps
After I was finished with the Desktop flow editing, I decided to take the whole thing one step further. I created a new Cloud flow that executes the test with an agent running on a Virtual Machine. The flow is really simple. It gets triggered by a HTTP GET request and the first step is to initiate the Desktop flow. Once the Desktop flow is finished, the Cloud flow examines whether testFailedMessage contains something or not and responds with either 500 or 200 HTTP status code.

The final step was to include this automated UI test as part of Azure DevOps build pipeline.
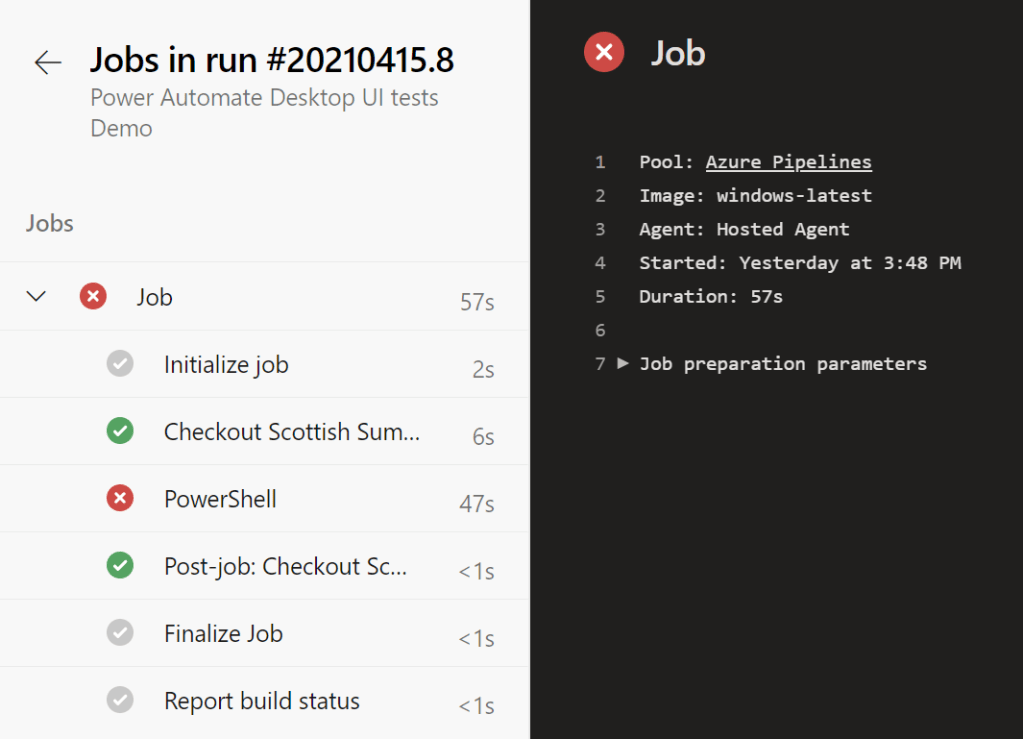
The reason why the above pipelin run fails is, that I broke the business rule on purpose when I was demoing the solution to my collegues. To prove the point, so to say.
Calling the Power Automate cloud flow was done simply with a PowerShell script task:
- task: PowerShell@2
  inputs:
    targetType: 'inline'
    script: |
      # Write your PowerShell commands here.

      Invoke-WebRequest -URI "https://prod-00.westeurope.logic.azure.com:443/workflows/xxxxxxxxxxxxxxxxxxxxx/triggers/manual/paths/invoke?api-version=2016-06-01&sp=%2Ftriggers%2Fmanual%2Frun&sv=1.0&sig=xxxxxxxxxxxxxxxx"
That task fails if the flow return an error code, and therefore we do not process the remaining steps in the pipeline – such as making a solution deployment from one environment to another.
