My colleague is currently working on a project where he needs to report working hours into two different systems. So, basically he needs to enter hours into our company’s own project management system, as well as into customer’s hour reporting system. At Cloudriven, we are using custom solution that basically consists of Azure SQL Database to hold the data, and of Power Apps based user interface to enable entering hours to the system. Customer’s hour reporting system is PlanMill.
Last month at Ignite Microsoft announced a preview of Power Automate Desktop.
…a new desktop-based robotic process automate (RPA) authoring solution that expands low-code automation capabilities for everyone in an organization…
Perhaps we can automate the work of entering hours to one of the PM systems by taking advantage of this brand new desktop application and UI flows? Let’s give it a shot!
So, what I need to do, is to create a Power Automate flow to that is run at the end of each day. That flow then fetches hours entered for the specific project, and for each entry it starts a UI flow to enter the hours into PlanMill using browser interface.
The flow I created is displayed below.
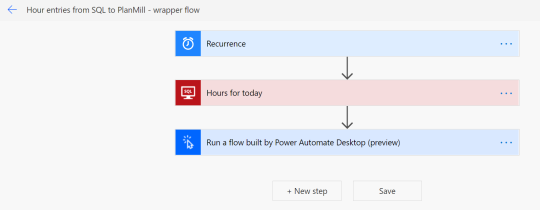
Notice the last action called Run a flow built by Power Automate Desktop (preview). I don’t even have the PA Desktop installed yet, but I bet that I can get it done by choosing the + Create a new UI flow option right within the action’s UI flow dropdown.

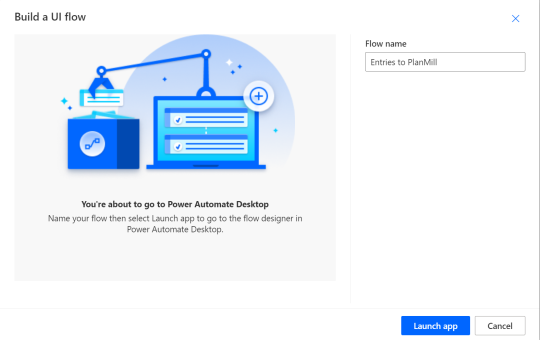
And voilá, after clicking the option, a Build a UI flow dialog is opened. I name the new UI flow as Entries to PlanMill.
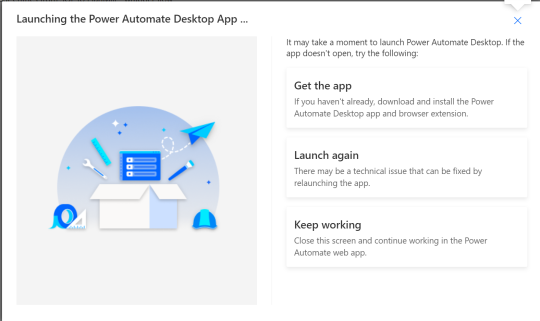
Next, I’m provided an option to download the app and a browser extension.
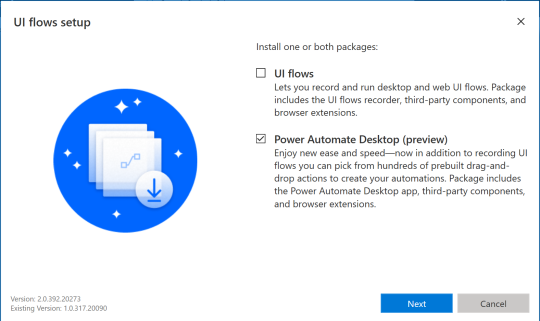
Installing the app is straightforward process. I’m choosing to install Power Automate Desktop only, not the older UI flows at all.
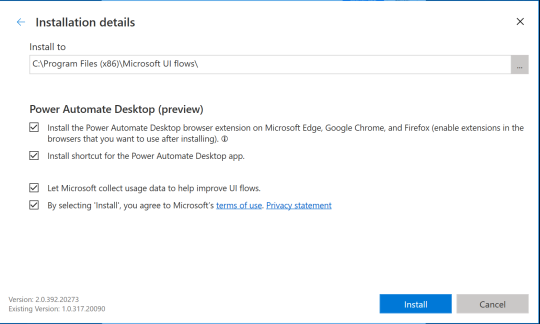
The installation took approximately two minutes, after which I still needed to enable Chrome and Edge extensions.


After installing the extensions, I returned back to the Launching the Power Automate Desktop App dialog and hit Launch again…
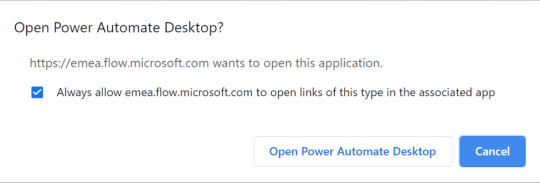
And there we have it, the brand new Power Automate Desktop is opened and even the new Entries to PlanMill flow is automatically created and opened for editing!
To actually get hour entries entered into correct PlanMill project, I would be needing help from my colleague, since I don’t have required access to the target system. Therefore I will split this blog post into two parts, and in this first part I’ll simply cover the installation of the Power Automate Desktop and giving it the first round of testing to learn little bit about it. In the next part I’ll then try to finalize the process with my colleague by actully have the entries inserted into the actual target system.
So, to finalize this blog post, let’s create a simple flow that uses Outlook web interface to send my daily hours to… well, me!
I start the flow by dragging the Launch new Chrome action under Web automation category onto the canvas.

After filling in the initial URL I save the action. It’s time for the first run! But when I hit the Run button in the toolbar I bump into the first problem. The browser starts, allright, but when all the elements of the inbox page are loaded, I see an error text in the Errors pane of the PA Desktop.
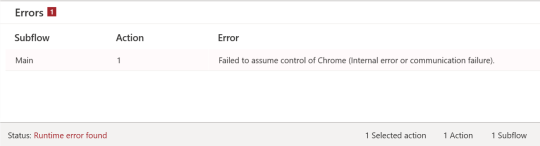
Then I noticed, that I had a pending update waiting in Chrome and after restarting the Chrome browser the error disappeared. So far so good, let’s move forward!
I created quite a simple flow that launches a browser, navigates to https://outlook.office.com/mail/inbox, creates a new e-mail, and sets recipients and subject for the e-mail, and then finally sends the e-mail. Subject contains the reported hours. So eventually, when I get this thing stiched up, I should be receiving bunch of e-mails daily – one for each of the hour entries I’ve entered in Cloudriven’s hour reporting system for that day 🙂
Although the flow is that simple, it took me quite a long time to get it working properly. Here are some findings I’ve made during the process:
- It is really hard to get point-and-click feature of actions under Web automation category work – it seems like the browser add-on doesn’t always recognize that I am doing the left mouse click + Ctrl as instructed. Recording a series of actions with the Web recorder feature works better.
- Outlook web client is quite tricky to work with RPA. Lesson learned: always start a new session when doing a new recording, because elements get different id’s and stuff during the same session.
- You need to have the browser already opened (no matter what page) before you run the flow, otherwise you’ll get an error in communication with browser. (I hope there is a workaround or a browser setting I can use to get past this)
Eventually I got the flow working though! Next I needed to figure out the way to pass the actual hours to it from the parent flow.
For that purpose, I created two input variables for the flow by clicking the plus icon on Variables pane. One variable will hold the amount of hours and the other one will contain the project name or number.

Next, back to the parent flow. Now the Entries to PlanMill UI flow is available in the UI flow dropdown of the Run a flow built by Power Automate Desktop action.
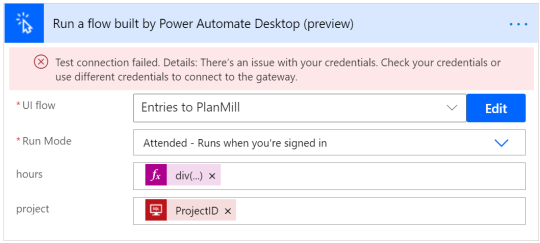
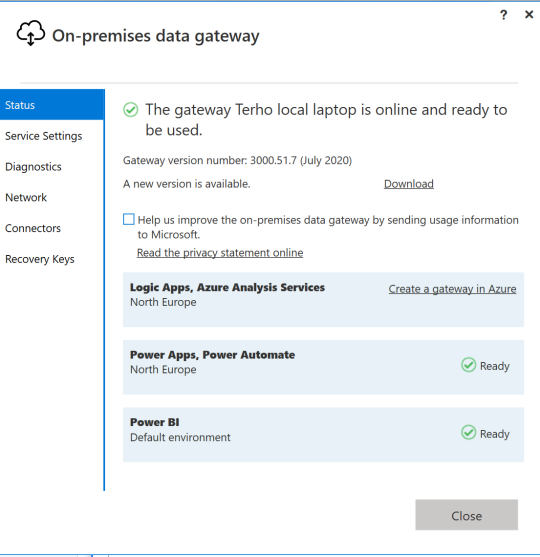
As you can see in the above image, I also needed to set up an on-premises data gateway so that Power Automate flow is able to invoke the UI flow I just created on my laptop.
After setting that up, it’s time to test the wrapper flow. What should happen when the flow runs is, that Edge browser on my laptop should start and browse to Office 365 Outlook service, create a new e-mail and send it to me so that the subject of the e-mail contains the project id and the hours.
And it did!
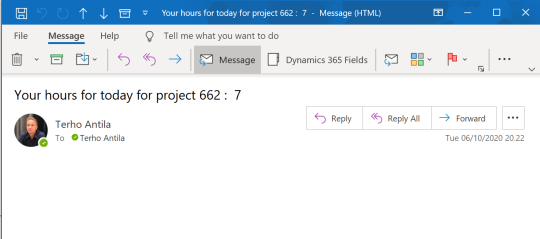
Above is the e-mail that got dropped into my inbox after the test run! For someone like me, who is not so familiar with RPA, this whole thing feels little bit like magic.
And I love it!
